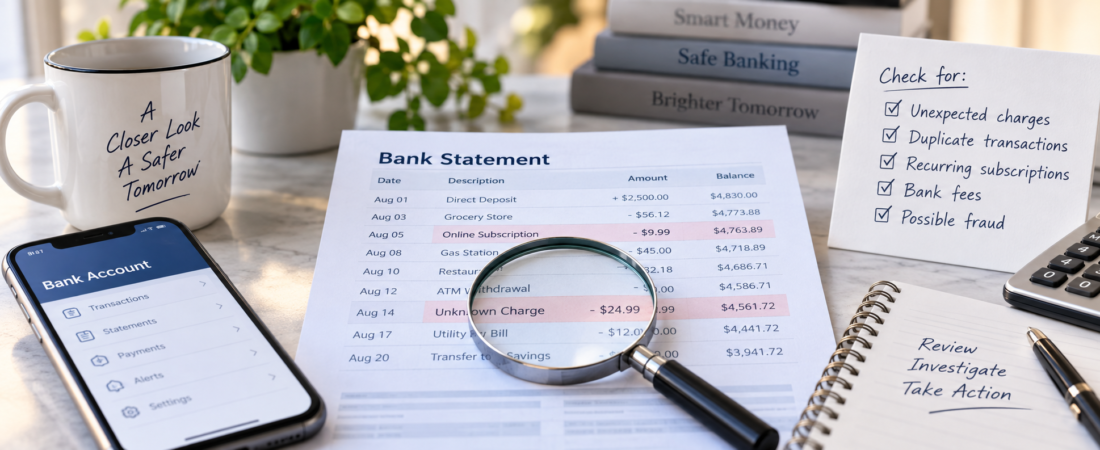
Learning how to review your bank statement can help you catch billing mistakes, forgotten recurring charges, duplicate transactions, and possible fraud before they become harder to resolve. The goal is not to question every purchase automatically. It is to compare the statement with your own records, investigate anything that does not make sense, and respond based on the type of problem you find.
A careful review usually takes less time when you use a repeatable process. Gather the statement and related account activity, scan every transaction, verify unfamiliar entries through reliable records, and keep notes about any dispute or correction. If a transaction appears unauthorized, contact the bank through an official channel promptly rather than waiting for the next statement.
What to Gather Before You Review Your Bank Statement
Use the statement period shown on the document, not just the transactions currently visible in your banking app. Statements may include a beginning balance, ending balance, deposits, withdrawals, transfers, fees, interest, and transactions that posted during a particular date range. Pending transactions may appear separately and may change before they officially post.
Have these records nearby:
- The bank statement, whether it is a paper copy or a downloaded electronic file
- Your checkbook register or personal transaction log, if you use one
- Receipts, order confirmations, appointment records, and email invoices
- Records for automatic payments, direct deposits, transfers, and cash withdrawals
- Access to your credit card and payment-app histories when those accounts may explain a charge
- Your monthly budget, if you use one to plan spending
Download or save a copy of the statement if you need to investigate something. Banking websites often organize recent activity differently from formal statements, and transaction descriptions can change as a payment moves from pending to posted. Keep the statement and your notes in a secure location rather than sending account details through an unsecured message.
How to Review Your Bank Statement Step by Step
1. Confirm the statement period and starting balance
Check the beginning and ending dates first. If you are comparing the statement with your own records, a mismatch in dates can make legitimate transactions appear missing or duplicated. Then compare the statement’s beginning balance with the previous statement’s ending balance, allowing for any correction or adjustment the bank identifies.
Next, confirm that the ending balance makes sense. You do not need to recalculate every mathematical detail immediately, but a significant difference between your records and the statement is a reason to slow down and investigate. A balance mismatch may result from an outstanding check, a pending debit, a bank fee, a deposit that posted later than expected, or a simple recording error.
2. Scan deposits and incoming money
Review direct deposits, mobile check deposits, transfers, refunds, interest, and other credits. Confirm that expected income arrived in the correct amount and that an unfamiliar deposit is not being mistaken for money that belongs to you. An unexpected credit can be a bank error, a reversed transaction, or a payment from another party that should not be spent until its source is clear.
For each deposit, compare the posted amount with the pay stub, transfer confirmation, check copy, or other record that supports it. Pay attention to deposits that were later reversed or adjusted. A deposit that appears in one part of the activity may not remain available if the bank later determines that it could not be collected.
3. Review withdrawals, purchases, and transfers one by one
Do not rely only on the transaction total at the bottom of the statement. Read each debit or withdrawal and mark it as verified, needs review, or unauthorized. This simple labeling system keeps a questionable charge from disappearing into a long list.
For verified transactions, check whether the amount and date match your records. The date may differ from the day you made a purchase because merchants can submit transactions later. The amount may also be different from what you remember if a tip, deposit, adjustment, currency conversion, or final restaurant charge was added after authorization.
4. Investigate unfamiliar descriptions before assuming fraud
Bank statements often use a merchant’s legal business name, payment processor, corporate parent, or billing descriptor instead of the storefront name you recognize. A restaurant, online marketplace, transportation service, or medical provider may therefore appear under a different name. Search your own email receipts, text messages, calendar, and purchase history before treating the transaction as unauthorized.
Check the amount as well as the name. A small unfamiliar charge may be a verification charge, a temporary authorization, or part of a larger purchase. A recurring charge may have changed slightly because of tax, shipping, usage, or a price adjustment. These possibilities do not prove that a charge is legitimate; they simply identify what to verify.
5. Separate posted transactions from pending activity
A pending transaction is not always the final amount. Hotels, rental-car companies, restaurants, gas stations, and some online merchants may place an authorization hold before the final amount is submitted. The available balance can be affected even though the transaction has not posted as a completed charge.
Record the pending item and check whether it posts, disappears, or changes. If a pending charge is clearly unrelated to anything you authorized, contact the bank promptly for guidance. Avoid assuming that waiting is always appropriate, particularly if your debit card or account information may have been compromised.
A bank may ask you to wait until a transaction posts before opening a formal dispute, but report suspected account compromise immediately and follow the bank’s instructions.
6. Check fees, interest, and adjustments separately
Fees are easy to overlook because they may be listed in a separate section or described with abbreviations. Look for monthly maintenance fees, overdraft-related charges, ATM fees, wire or transfer fees, returned-payment fees, and other account adjustments. Confirm that each fee matches the account agreement or the service you actually used.
A legitimate fee and an erroneous fee require different follow-up. If the charge is valid but unexpected, review the account’s fee schedule and consider whether a different account feature or banking habit would prevent it. For broader guidance on how to avoid common bank fees, keep that issue separate from the investigation of an unknown purchase. The immediate question is whether the fee is valid under the account agreement and actually applies to your account.
Common Sources of Unexpected Bank Charges
Unexpected does not necessarily mean fraudulent. Categorizing the charge helps you choose the right next step.
Recurring memberships and subscriptions
Free trials, streaming services, app memberships, software plans, fitness memberships, and delivery programs can continue billing after the original purchase is forgotten. A family member may also have used a shared card or account. Review email receipts, app-store purchase histories, and household records before disputing the charge.
Once you identify a recurring charge, determine whether it is still wanted, whether the amount changed, and whether the merchant’s cancellation process produced a confirmation. If the service is no longer needed, find and cancel unused subscriptions rather than merely deleting the app or ignoring future statements.
Merchant names that look unfamiliar
The descriptor may identify a parent company or payment processor rather than the business name displayed at the register. Try matching the date and amount to receipts before contacting the merchant. If you call, use contact information from the merchant’s official website or a trusted receipt, not a phone number supplied by a suspicious text or email.
Temporary authorizations and corrected amounts
Some businesses verify a card with a small temporary amount or place a larger hold that is later released. A final charge can also include a tip or an adjustment. Compare the pending and posted entries, and allow for normal processing time while continuing to monitor the account.
Automatic payments and account transfers
Insurance premiums, utilities, rent, loan payments, and other scheduled debits may be easy to miss when their dates or amounts vary. Compare them with bills and payment confirmations. Also check whether a transfer was sent from a savings account, a payment app, or another account that you do not review as often.
Reviewing recurring household bills is a separate money-saving task. For this statement review, focus first on identifying the charge, confirming the amount, and determining whether the transaction was authorized.
Duplicate or altered transactions
Two identical charges may be a legitimate split transaction, a pending item followed by the posted item, or a duplicate submission. Compare dates, descriptions, and amounts. Contact the merchant first when the purchase is recognizable but appears to have been processed twice; contact the bank as well if the merchant cannot correct it or the transaction may be unauthorized.
How to Tell a Billing Error From Possible Fraud
A billing error usually has a recognizable connection to a real purchase, service, or account relationship. Examples include a duplicate charge, an incorrect amount, a fee that does not match the agreement, or a subscription that continued after a properly documented cancellation.
Possible fraud is more likely when you cannot connect the charge to anyone authorized to use the account, several unfamiliar transactions appear together, the transaction is from a location or merchant with no plausible connection, or your card or account information may have been exposed. A small test charge followed by larger attempts deserves attention even if the small amount seems insignificant.
Do not make the decision based only on the transaction’s size. An unauthorized charge can be small, while a legitimate charge can be substantial. Use your records, household communication, and the bank’s transaction details to establish what happened.
What to Do When You Find an Unauthorized Charge
1. Secure the account through an official channel
Use the bank’s official app, the phone number on your debit card, or a statement you already trust. Avoid links in unexpected texts, emails, or social-media messages. Ask what steps are available to block the card, stop additional transactions, replace account credentials, or protect other accounts connected to the payment method.
If your online banking credentials may be exposed, change them through the official website or app and use a new password that is not reused elsewhere. Review account contact information and security settings for changes you did not make.
2. Record the facts before the details fade
Write down the transaction date, posted amount, description, account involved, and when you noticed it. Record the date and time of your contact with the bank, the department you reached, and any reference number provided. Keep copies of relevant receipts, emails, cancellation confirmations, and screenshots.
Do not record full account numbers, passwords, or security codes in a general notes file. Store investigation records securely and share sensitive information only through the bank’s approved process.
3. Ask what formal dispute process applies
The process can differ depending on whether the issue involves a debit card purchase, electronic transfer, check, ATM withdrawal, or another account transaction. Ask how to submit the claim, what information is needed, whether the card should be replaced, and how the bank will communicate its decision.
Read the bank’s instructions carefully and meet any stated response deadline. Keep the submitted information and confirmation. If the bank asks for additional documentation, provide copies rather than your only original records.
4. Continue monitoring connected accounts
Check other accounts that used the same card, email address, password, or payment service. Look for changes to contact details, new payees, unfamiliar transfers, and password-reset notices. If the problem involves identity theft or a broader compromise, follow the relevant guidance from official government or financial institutions and consider which accounts need additional protection.
When to Contact the Merchant Instead
Contact the merchant when you recognize the purchase but believe the amount, quantity, timing, or cancellation status is wrong. Start with a concise explanation and provide the transaction date and amount. Ask for a correction or written confirmation rather than relying only on a verbal promise.
Merchant contact is especially useful for duplicate purchases, subscription cancellations, returned merchandise, and final amounts that differ from an order confirmation. If the merchant does not respond, refuses to correct a clear error, or the transaction is not yours at all, preserve the records and use the bank’s dispute process as appropriate.
How Often Should You Review Your Bank Statement?
A monthly formal statement review is a practical minimum for many people, but it should not be the only check. Review recent account activity more frequently if you use a debit card often, share an account, travel, manage automatic payments, or have recently lost a card or entered payment information on an unfamiliar website.
Schedule a consistent review date, such as the day after the statement becomes available. A regular habit makes unusual activity easier to recognize because you are familiar with normal deposits, merchants, and payment dates. If you use a budget, compare your statement with your monthly budget after verifying the transactions. Budgeting can reveal spending patterns, but it should not replace checking whether each transaction was authorized.
A Practical Statement-Review Checklist
- Confirm the statement period and beginning balance.
- Verify expected deposits, refunds, and transfers.
- Read every debit, withdrawal, and card-related entry.
- Mark each transaction as verified, needs review, or unauthorized.
- Match unfamiliar descriptions with receipts, emails, and household records.
- Separate pending authorizations from posted transactions.
- Check recurring payments, fees, interest, and account adjustments.
- Investigate duplicate, reversed, or unusually changed amounts.
- Contact the merchant for recognizable billing mistakes.
- Contact the bank promptly through an official channel for possible fraud.
- Record dates, reference numbers, documents sent, and promised follow-up.
- Continue monitoring the account after the issue is reported.
Final Takeaway
To review your bank statement effectively, treat it as a transaction record rather than a balance summary. Verify incoming and outgoing money, investigate unfamiliar descriptions without jumping to conclusions, and distinguish a legitimate fee or merchant error from an unauthorized transaction. When fraud is possible, secure the account and document the report promptly; when the charge is recognizable but wrong, give the merchant and bank enough detail to correct it.
Disclaimer
This article is for general informational purposes only and is not financial, tax, legal, or investment advice. Rules, rates, eligibility, and financial outcomes can vary by person and location. Verify current information with official sources and consult a qualified professional for guidance about your specific situation.
Leave a Reply